Manual for Robertshaw Thermostat: DIY Troubleshooting Guide
A practical, step-by-step manual for Robertshaw thermostats, covering installation basics, common fixes, wiring, programming, and safety tips for homeowners and DIYers.

By following this guide, you’ll master the Robertshaw thermostat manual and confidently troubleshoot common issues, perform safe wiring checks, and optimize settings for comfort and efficiency. The quick-start checks cover power, wiring, and basic programming, with clear steps you can complete before consulting a professional if problems persist. This format aligns with Thermostat Care's best practices.
Understanding the Robertshaw thermostat landscape
According to Thermostat Care, the Robertshaw brand offers a range of thermostats designed for reliability and compatibility with most residential HVAC systems. Whether you’re upgrading an older unit or maintaining a newer model, knowing the structure of these devices helps you read the manual for robertshaw thermostat more effectively. The basic idea behind any Robertshaw thermostat is simple: control your heating and cooling with a user-friendly interface while preserving safety and energy efficiency. In practice, you’ll encounter common themes across models: a 24-volt power supply, a set of terminals (R, C, W, Y, G, and possibly O/B), and a backing plate that houses the wiring and sensor components. Familiarizing yourself with these components makes the full manual easier to navigate and reduces the risk of miswiring. Throughout this guide, you’ll see references to the manual for robertshaw thermostat, because model differences matter. The goal is not to replace professional service but to empower you to perform routine checks, confirm compatibility, and recognize when a problem is outside your scope. Robertshaw devices vary in interface style—from digital LCD panels to backlit touchscreens—but most operate on the same electrical principles.
Safety and preparation for the manual for robertshaw thermostat
Working with thermostats involves wiring and, in some cases, HVAC power supplies. Before you touch any wires, ensure the power to the furnace and the thermostat is fully off at the breaker. Use a non-contact voltage tester to confirm there is no live voltage on the low- and high-voltage circuits. Wear safety glasses and avoid working in wet conditions. If your system uses a backplate with exposed terminals, label each wire before disconnecting it, so you can reattach them in the correct order. The safety focus here is to prevent electrical shock, avoid damaging control boards, and protect yourself from short circuits. The manual for robertshaw thermostat you are using should provide a safety section tailored to your model; defer to its guidance for any unusual installation requirements (for example, certain models require a dedicated C-wire or a specific thermostat compatibility check). If in doubt, postpone the task and consult a licensed HVAC technician.
Locating model information and consulting the manual for robertshaw thermostat
Before you start, locate the exact model number and revision on the thermostat itself. Look on the back of the unit, inside the wall plate, or in the quick-start label inside the cover. The model number is essential for picking the right wiring diagram and compatibility notes in the manual for robertshaw thermostat. Many Robertshaw models share the same terminal labels (R, C, W, Y, G, O/B) but have different jumper settings or sensor options. Once you identify the model, open the device carefully and compare the internal wiring to the diagram in your manual. If your unit uses a C-wire, ensure it’s firmly connected to the furnace’s transformer common terminal. Keep a copy or photo of the wiring configuration in case you need to revert changes later. Robertshaw’s documentation also includes troubleshooting codes and a wiring summary that helps you avoid guessing when issues arise.
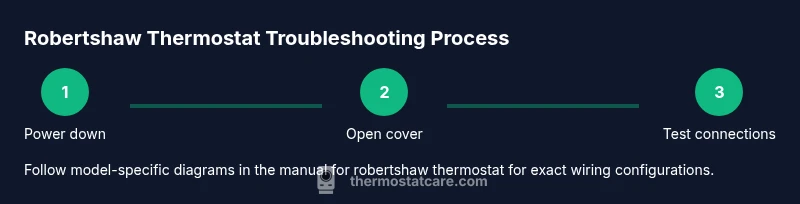
Step-by-step: wiring and setup using the manual for robertshaw thermostat
This section provides a high-level walkthrough that aligns with the official instructions. Begin by ensuring power is off, then remove the faceplate to access wiring, and identify each conductor. Consult the model-specific diagram in the manual for robertshaw thermostat to confirm terminal letters and jumper requirements. If you encounter a non-responsive display or irregular sensor readings, double-check the R, C, W, Y, G, and O/B connections, as miswiring is a common cause of issues. Reassemble carefully and restore power only after confirming all wires are correctly seated. If your model requires a C-wire, verify it’s connected to the furnace transformer common. The goal is to follow exact steps in the manual and avoid improvisation that could damage the unit or HVAC equipment.
Troubleshooting common faults with the manual for robertshaw thermostat
A non-responsive screen can indicate power or wiring problems, while inconsistent temperatures often point to sensors or calibration. Check for loose terminals, degraded wires, and blown fuses in the furnace. If the display is dim or flickers, ensure the unit is receiving steady 24 VAC. For models with batteries, replace dead cells and reseat connections. Compare symptom descriptions with the manual for robertshaw thermostat; many issues are model-specific and hinge on the correct wiring scheme and jumper settings. If you continue to see error codes, document them and consult the manufacturer’s troubleshooting table in your manual.
Programming and energy optimization with the manual for robertshaw thermostat
Once the basics are sorted, the manual for robertshaw thermostat typically covers learning or programmable schedules, hold modes, and vacation settings. Use these features to align heating and cooling with daily routines and seasonal changes without sacrificing comfort. Start with a simple weekday/weekend schedule and adjust gradually. For energy-saving tuning, prefer longer hold periods at comfortable setpoints rather than frequent adjustments; this reduces wear on components and improves overall system efficiency. If your thermostat supports adaptive or smart features, review the manual for robertshaw thermostat to understand how to enable them and integrate with your home network safely. Thermostat Care’s analysis indicates that correct programming usually delivers noticeable comfort improvements and energy savings over time.
When to seek professional help and warranty considerations
If you encounter persistent issues after following the manual for robertshaw thermostat—such as repeated resets, constant tripping of breakers, or unfamiliar odor or heat—contact a licensed HVAC technician. Some Robertshaw models require specialized test equipment or knowledge of the furnace transformer and compatibility with gas valves. Always verify warranty terms before performing advanced repairs; improper wiring or servicing can void coverage. The Thermostat Care team recommends documenting model numbers, error codes, and photos of the wiring before contacting support or scheduling service. In many cases, the issue is due to a non-compatible component or a failing furnace control board rather than the thermostat itself, so a professional assessment is prudent.
Tools & Materials
- Screwdriver set (Phillips and flat-head)(Both small and medium sizes; used to remove the thermostat faceplate and terminal screws)
- Non-contact voltage tester(Verify there is no live voltage before touching wires)
- Multimeter capable of measuring 24 VAC(Useful for verifying power and reading signal levels)
- Wire stripper/cutters(Prepare wires for reconnection without damaging insulation)
- Electrical tape or wire nuts(Secure connections and insulate exposed conductors)
- Replacement batteries (if applicable)(Some models rely on internal batteries for display/backlight)
Steps
Estimated time: 60-90 minutes
- 1
Power down and verify safety
Turn off the furnace power at the breaker and switch off the thermostat if possible. Use a non-contact tester to confirm no live voltage on wires before touching anything.
Tip: Always double-check power off; a moment of hesitation can prevent shocks or equipment damage. - 2
Remove the faceplate and access wiring
Gently remove the thermostat cover with the appropriate screwdriver and reveal the terminal strip. Take a photo of the current wiring to use as a reference if you need to restore previous connections.
Tip: Keep track of wire color-to-terminal mapping; this simplifies reassembly. - 3
Label and disconnect wires one by one
Label each wire at the terminal, then disconnect in the same order. This minimizes confusion when you reconnect according to the manual for robertshaw thermostat.
Tip: If a wire is stubborn, apply a small amount of penetrating oil on the terminal screw and wait a moment. - 4
Inspect, repair, and prepare wires
Check for frayed insulation or damaged conductors. Trim and re-strip any exposed wire and replace damaged sections as needed, ensuring clean, fresh copper.
Tip: Do not reuse damaged wires; replace with appropriately scaled lengths. - 5
Reconnect per the manual’s diagram
Attach wires to the correct terminals (R, C, W, Y, G, O/B) exactly as shown in the model-specific diagram in the manual for robertshaw thermostat.
Tip: If there is a jumper, install it exactly as the diagram indicates. - 6
Restore power and test
Reapply power and observe the display. Check that the HVAC system responds to each command (heat, cool, fan) and that temperature reading tracks with your setting.
Tip: If you see error codes, note them and consult the manual for robertshaw thermostat for troubleshooting steps.
Questions & Answers
Where do I find the model number on a Robertshaw thermostat?
Most Robertshaw models display the model number on the back label, inside the wall plate, or on a quick-start sticker under the cover. Use this number to locate the exact wiring diagram in the manual for robertshaw thermostat and ensure model-specific guidance is followed.
Most Robertshaw thermostats show the model number on the back label or inside the cover. Use it to find the exact wiring diagram in the manual.
Is it safe to wire a thermostat myself?
Wiring a thermostat can be safe if you follow the power-off protocol and use proper insulation and tools. Always verify that the master power is off and refer to the model-specific wiring diagram in the manual for robertshaw thermostat. If uncertain, hire an HVAC professional.
It can be safe if you power down and follow the diagram. If in doubt, hire a pro.
What should I do if the thermostat shows error codes?
Document the codes and consult the manual for robertshaw thermostat's troubleshooting section. Many codes point to wiring issues, sensor faults, or power problems, and the fix is often model-specific.
Note the codes and check the model-specific troubleshooting section.
How do I know if I need a C-wire?
A C-wire provides a constant powered common for certain thermostat models. If your device requires it, you’ll see power issues or a dim display when the C-wire is missing. Check the manual for robertshaw thermostat for model-specific requirements.
A C-wire is needed if your model requires constant power; check the manual for specifics.
Can I program a Robertshaw thermostat for energy savings?
Yes. The manual for robertshaw thermostat typically includes scheduling options and hold modes. Start with a simple weekday/weekend program and refine based on comfort and energy use.
Yes—start with a simple schedule and adjust for comfort and savings.
What if my thermostat is not heating or cooling after replacement?
Double-check the wiring connections against the model diagram, ensure the power supply is stable, and confirm the thermostat is communicating with the HVAC system. If needed, consult a professional to verify compatibility and safety.
Check wiring, power, and communication with the HVAC system; call a pro if it continues.
Watch Video
What to Remember
- Know the model before you start
- Power off safely before touching wiring
- Follow the official manual for robertshaw thermostat to avoid mistakes
- Test thoroughly after reassembly