How to Put Thermostat on Emergency Heat
Learn how to safely activate Emergency Heat on your thermostat, when to use it, and troubleshoot common issues with clear, step-by-step guidance from Thermostat Care.

Goal: switch your thermostat to Emergency Heat when your heat pump or furnace isn’t delivering heat. You’ll need basic tools, access to the thermostat, and a quick safety check. This quick guide summarizes the exact steps, safety notes, and when to call a professional. According to Thermostat Care, start by locating the EM heat option.
What Emergency Heat is and when to use it
Emergency Heat is a back-up mode for heat pumps and some furnaces. It activates when the primary heating source struggles to meet demand, typically using an auxiliary heat source to maintain warmth. This mode is useful during extended cold snaps or when the heat pump isn’t delivering adequate heat. It’s not designed for daily use because it consumes more energy and raises operating costs. If you’re unsure whether your system supports Emergency Heat, consult the thermostat’s manual or Thermostat Care’s troubleshooting guide. When you know how to put thermostat on emergency heat, you’ll be better prepared to keep your home comfortable during equipment issues or severe weather. In our tests and reviews, homeowners who use Emergency Heat sparingly report fewer comfort gaps during critical times.
Safety reminders before you begin
Before adjusting any thermostat settings, ensure you understand safety basics. Do not remove the thermostat cover or touch wires unless you’ve consulted the user manual. Use a non-contact voltage tester if you must verify power levels at the thermostat without disassembly. If you smell gas, hear abnormal noises, or suspect a furnace issue, shut off power at the main breaker and contact a licensed HVAC technician. Keep children and pets away from the thermostat while you work. Thermostat Care emphasizes safety as the foundation of any DIY thermostat work.
Understanding thermostat terminology and modes
Most thermostats offer several modes: Heat, Cool, Auto, and Emergency Heat. Emergency Heat (often labeled AUX or Emerg) activates an auxiliary heating element when the primary system can’t meet demand. This mode can significantly increase energy use, so use it as a temporary workaround rather than a long-term setting. If you have a heat pump with a fossil-fuel backup, Emergency Heat may engage that backup as well. Clear labeling and model-specific terminology matter; consult the manual and Thermostat Care’s glossary if you’re unsure which option is EM Heat on your device.
What to expect after you switch to Emergency Heat
When Emergency Heat is active, you’ll often notice the system ramping up more quickly, but it may run longer and hotter than normal in a short period. Expect increased energy use, especially during very cold weather. If the outdoor unit is obstructed or iced up, or if indoor air feels cooler than expected after a short period, reassess the setup. Listen for unusual noises, and check vents for consistent warm air. If you don’t feel warmth within 15-20 minutes, switch back to normal heating mode and run a standard cycle to confirm regular operation. Thermostat Care notes that prolonged use should be avoided unless necessary due to efficiency concerns.
Troubleshooting common issues after activation
If Emergency Heat doesn’t produce adequate warmth, verify the following: 1) The thermostat is definitely in EM Heat (not stuck in a mixed mode). 2) The setpoint is within the equipment’s rated range. 3) There are no tripped breakers or blown fuses affecting the system. 4) The outdoor unit is not blocked by snow or debris. If issues persist, consult the thermostat manual for error codes and contact a qualified HVAC technician. Thermostat Care suggests documenting any codes to share with a technician for faster diagnostics.
Authority sources and safety standards
For safety and best practices, refer to authoritative sources on electrical safety and home heating systems. Always follow manufacturer instructions and local codes when modifying thermostat settings. See the following resources for general safety guidance and thermostat installation considerations:
- Energy.gov
- OSHA.gov
- CDC NIOSH electrical safety overview
These sources help homeowners understand the fundamentals of safe operation and when professional help is warranted.
Quick troubleshooting if it doesn’t respond
If Emergency Heat does not respond as expected, perform a quick validation: verify power to the thermostat is on, confirm the thermostat is communicating with the HVAC system, and ensure the wiring hasn’t become loose. After making any adjustments, allow 5-10 minutes for the system to respond before making further changes. If there’s still no heat, revert to a standard setting and call a professional to diagnose possible components failures (thermostat, wiring, or the heat source).
Tools & Materials
- Phillips head screwdriver #2(for thermostat cover screws)
- Non-contact voltage tester(verify power is off before touching wiring)
- Thermostat manual (model-specific)(location of Emergency Heat option varies by model)
- Camera or smartphone(capture wiring configuration before changes)
- Working flashlight(extra light for dim thermostat panels)
Steps
Estimated time: 10-15 minutes
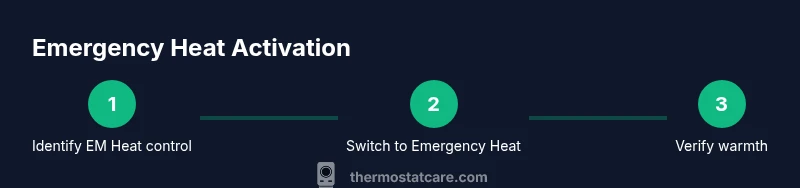
- 1
Identify Emergency Heat control
Open the thermostat menu and locate the EM Heat option (it may be labeled AUX, Emerg, or Emergency Heat). Verify you can access the control without removing major components. This step ensures you know exactly where to switch.
Tip: If you can’t find EM Heat, consult the manual or Thermostat Care’s troubleshooting glossary. - 2
Switch thermostat to Emergency Heat
Select EM Heat or its equivalent and confirm the change on the display. Allow the thermostat to register the new mode and wait for the system to respond.
Tip: Take a photo of the current settings before changing anything to reference later. - 3
Set a safe temperature target
Set the thermostat to a comfortable temperature within the system’s rated range rather than extreme values. This helps the backup heat work efficiently without overworking the equipment.
Tip: Avoid setting it very high; moderate adjustments improve comfort and energy use. - 4
Monitor system response
Watch the vents for warm air and listen for the system’s cycling pattern. If warmth is not felt within 15-20 minutes, recheck mode and setpoint, then consider returning to normal heating.
Tip: Record any odd sounds or error codes to share with a technician if needed. - 5
Return to standard heating when possible
As soon as the primary heat source rebuilds efficiency, switch back to your normal Heat mode and run a quick cycle to confirm everything functions properly.
Tip: Avoid leaving Emergency Heat active longer than needed to maintain energy efficiency.
Questions & Answers
What does Emergency Heat do on my thermostat?
Emergency Heat engages an auxiliary heat source when the primary system can’t meet demand. It can be less efficient and should be used temporarily during outages or extreme weather.
Emergency Heat uses backup heat to warm your home when the main system isn’t enough, so it’s best used for short periods.
Is it safe to leave Emergency Heat on for a long time?
Using Emergency Heat long-term can raise energy costs and wear on components. Use it only until your primary system is restored or weather improves.
It’s safe if you keep it short, but it’s expensive and not as efficient as normal heating.
What if my thermostat doesn’t show Emergency Heat?
Some models label it Aux or Emerg Heat. Check the manual or model-specific settings. If missing, your system may not support Emergency Heat.
If you don’t see EM Heat, check the manual or contact support for your specific model.
Do I need a professional to activate Emergency Heat?
Most homeowners can switch to Emergency Heat themselves following the manual. Contact a technician if you notice weird noises, smells, or the system fails to respond.
You can usually do it yourself, but call a pro if you’re unsure or something seems wrong.
How can I tell if Emergency Heat is actually warming the space?
Check for warm air from vents within 15-20 minutes and compare room temperature to the thermostat setting. If not warming, review mode and setpoint and seek help if needed.
Feel the air from vents after a short while and ensure the room warms toward the set temperature.
Watch Video
What to Remember
- Identify EM Heat before changing settings
- Switch to Emergency Heat only when necessary
- Monitor warmth and system response after activation
- Return to normal mode when the primary heat source is operable