Can You Use a Smart Thermostat with Electric Baseboard Heat? A Practical Guide
Can you use a smart thermostat with electric baseboard heat? This guide explains compatibility, required relays, installation steps, safety considerations, and practical tips for safe, reliable control.

In most homes, you can't directly use a consumer smart thermostat with electric baseboard heat because baseboards run on line voltage and standard smart thermostats are low-voltage devices that require a C-wire. To use a smart thermostat, either install a line-voltage thermostat rated for baseboard heat or add a relay/adapter that lets a low-voltage thermostat control the line-voltage circuit. A few models offer built‑in line-voltage control—always verify compatibility before buying.
Why compatibility matters with electric baseboard heat
Electric baseboard heating uses line-voltage electricity (typically 120V or 240V) to directly heat radiating elements. A typical consumer smart thermostat expects a low-voltage control signal (24V) and relies on a C-wire for power. Mixing these two worlds without a proper interface can damage equipment, create safety hazards, and void warranties. According to Thermostat Care, many homeowners underestimate the importance of using the correct interface between the thermostat and the baseboard circuit. The Thermostat Care team found that when homeowners force a low-voltage thermostat onto a line-voltage circuit, the result is either a non-functional setup or a risky, unsafe installation. The takeaway is clear: you need a properly rated device or a relay that safely translates the signals. This section sets the stage for practical, safe options that keep your system reliable and within code.
How electric baseboard heat works and what smart thermostats expect
Electric baseboard units act as resistive heaters wired directly to the electrical service. They do not typically have a common 24V control loop that a smart thermostat requires. A smart thermostat is designed to switch a low-voltage circuit; it cannot safely power or switch line voltage by itself. If you want smart-control for baseboard heat, you must either use a line-voltage thermostat that’s specifically rated for baseboard use or employ a relay/adapter that lets a standard smart thermostat control the high-voltage circuit through an auxiliary contact. The design goal is to isolate the high-voltage load from the thermostat’s electronics while preserving the desired scheduling and temperature-control features. The practical implication: pick the right interface before you buy equipment, or you’ll be stuck with a nonfunctional or unsafe setup.
Direct compatibility: can you hook a smart thermostat to baseboard heat?
Direct compatibility is not typical. A consumer-grade smart thermostat lacks the internal wiring and rating to switch line voltage safely. Some older or specialty products advertise compatibility with baseboard heat, but most consumer models require a low-voltage environment. If you see a thermostat marketed for baseboard use, confirm its voltage rating and wiring method. In general, you should treat baseboard heating as a line-voltage load and use a compatible line-voltage control path. Thermostat Care analysis shows that attempting a direct hookup without the proper interface can lead to tripped breakers, melted wiring insulation, or fire hazards. The safest approach is to use either a dedicated line-voltage thermostat or a smart thermostat connected to a relay module designed for baseboard heating.
Options: relays, line-voltage thermostats, and smart-relay solutions
There are three practical paths to enable smart control for electric baseboard heat:
- Use a dedicated line-voltage thermostat designed for baseboard systems. These devices are built to safely switch high voltage and often provide a straightforward installation.
- Install a relay module or contactor that is compatible with your smart thermostat’s control signal (often a 24V or 12V input) to switch the baseboard circuit. This keeps the thermostat’s electronics isolated from the high-voltage load.
- Choose a smart thermostat that includes built-in line-voltage control or a factory-integrated solution for baseboard heating. These models are less common and typically come at a higher price, but simplify wiring and safety.
Each path has different implications for safety, wiring, and cost. The Thermostat Care team recommends reviewing product specifications, ensuring the device is UL-listed for line voltage, and confirming that the control method matches your home’s electrical code requirements.
Choosing the right setup: models, compatibility, and safety
When evaluating options, start with your voltage (120V vs 240V), available space for a relay or thermostat, and whether you want a truly connected smart-home experience. If you opt for a line-voltage thermostat, ensure it’s rated for the exact baseboard load and circuit type (single-pole or double-pole). If you use a relay kit, check the relay’s voltage and current rating, the thermostat’s compatibility with the relay, and whether you’ll need separate power for the thermostat. Safety is critical: turn off power at the breaker before any wiring, verify with a voltage tester, and follow local electrical codes. Thermostat Care emphasizes choosing equipment from reputable manufacturers with clear installation instructions and warranty support. A wrong choice can create nuisance trips and safety risks.
Wiring essentials and safety considerations
Baseboard heat involves live electrical conductors; incorrect wiring can cause shock, fire, or equipment failure. Before you begin, shut off power at the main panel and test all conductors with a tester. Use proper-rated connectors, enclosed enclosures, and strain-relief on cables. If you’re wiring through a relay, ensure the relay coil is supplied with the thermostat’s control voltage, and the switched side is isolated from the thermostat. Avoid daisy-chaining multiple circuits through a single thermostat unless the product explicitly supports it. If you have any doubt about amperage, wire gauge, or enclosure integrity, consult a licensed electrician. The goal is safe, code-compliant wiring that preserves the life of both the thermostat system and the baseboard heater.
Installation paths: DIY vs. professional help
A DIY installation can be possible for straightforward relay-based setups or when installing a dedicated line-voltage thermostat that matches your baseboard’s rating. However, many jurisdictions require a licensed electrician for high-voltage work, and warranties often hinge on proper installation by a pro. If you decide to DIY, use only equipment rated for the exact voltage and load, follow the manufacturer’s wiring diagrams to the letter, and keep a spare breaker on hand in case of accidental trips. If you choose to hire a professional, ask about their experience with baseboard heat, verify license/insurance, and request a written estimate with a clear scope of work. Thermostat Care advocates a cautious, code-compliant approach to avoid safety hazards and ensure reliable operation.
Testing and validating performance
After installation, restore power and test the system in stages: first verify that the thermostat powers on, then confirm that the relay or line-voltage thermostat is switching the baseboard circuit as commanded. Check that the room responds to temperature changes and that no unusual noises or warm spots appear around the heater. If possible, monitor the system for a few days to ensure consistent behavior and no nuisance tripping. Document any anomalies and adjust schedules or setpoints accordingly. Regular testing is part of responsible thermostat care and helps avoid surprises during peak heating season.
Energy efficiency and cost implications
Smart control can improve comfort and potentially reduce energy use by enabling better scheduling and temperature control. The exact savings depend on your home’s insulation, occupancy, and climate, but a smart control strategy generally yields more consistent temperatures and fewer energy spikes compared with a basic, manually controlled baseboard system. Remember that the baseboard system’s efficiency is tied to proper insulation and zoning. If you’re weighing costs, factor in the initial hardware investment, potential electrician fees, and any ongoing maintenance. Thermostat Care analysis suggests that while upfront costs exist, the long-term comfort gains and energy savings can justify the investment when paired with proper insulation and zoning.
Thermostat Care verdict and practical tips
The Thermostat Care team recommends using a properly rated line-voltage device or a relay-based solution to control electric baseboard heat with a smart thermostat. Directly connecting a standard smart thermostat to baseboard heat is not advised due to safety and compatibility concerns. If you’re unsure about wiring, consult a licensed electrician and verify product certifications. In most cases, a dedicated line-voltage thermostat or a relay kit designed for smart control will deliver the safest, most reliable experience while preserving the benefits of modern heating schedules.
Energy considerations and common misconceptions
Common misconception: all smart thermostats can control any heating system. Reality: many systems require specific interfaces for safe operation. Always confirm that the control device is rated for your baseboard’s line voltage and current. Energy-efficiency benefits come from proper scheduling, zoning, and sealing air leaks, not from the thermostat alone. Thermostat Care emphasizes pairing intelligent scheduling with physical improvements to maximize comfort and minimize waste. If you’re replacing an aging, inefficient baseboard setup, justify the upgrade by measuring load, considering zoning, and ensuring compatibility with your home’s electrical system. A well-chosen interface can unlock much of the convenience and energy savings modern thermostats promise.
Tools & Materials
- Line-voltage thermostat rated for baseboard heat(Ensure compatibility with your circuit voltage (120V or 240V) and load.)
- Line-voltage relay kit (for smart thermostat control)(Provides safe isolation between low-voltage thermostat and high-voltage baseboard circuit.)
- Voltage tester(Verify power is off before starting and confirm circuit is live before testing.)
- Wire cutters/strippers(Clean cuts and proper stripping prevent loose connections.)
- Electrical tape / compatible wire connectors(Secure terminations and prevent shorts; use UL-listed connectors.)
- Enclosed junction box or conduit(Use if wiring in exposed or accessible spaces for safety.)
- Licensed electrician (optional, for complex jobs)(Professional assistance ensures code compliance and safety.)
Steps
Estimated time: 1-2 hours
- 1
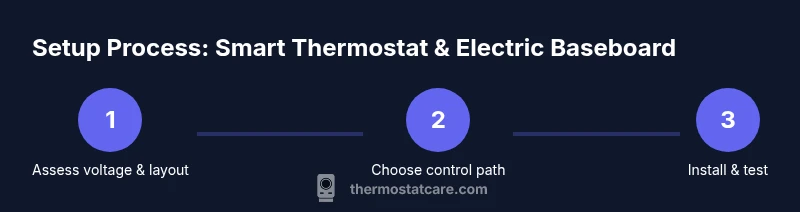
Assess system voltage and heating layout
Identify whether your baseboard circuit is 120V or 240V and locate the control wiring. Check if you have space in the electrical panel and in the heater’s junction box for a relay or line-voltage thermostat. This planning reduces rework and helps you choose the correct interface.
Tip: Take photos of existing wiring before making changes to reference in the future. - 2
Choose the right control path
Decide between a dedicated line-voltage thermostat or a smart thermostat paired with a relay kit. Compare voltage ratings, load capacity, and installation complexity. A properly rated device prevents nuisance trips and motor burnout.
Tip: Prioritize devices with clear labeling for single-pole or double-pole switching as required by your circuit. - 3
Power down at the breaker
Shut off power to the baseboard heater at the main panel. Use a voltage tester to confirm no voltage remains in conductors you’ll touch. This step is essential for personal safety and prevents electrical arcing.
Tip: Lockout/tagout the circuit if others might restore power unexpectedly. - 4
Install the relay or line-voltage thermostat
Mount the device in a suitable enclosure. Follow the manufacturer’s wiring diagram to connect the line side to the baseboard heater and the control side to the thermostat or low-voltage signal as applicable.
Tip: Keep conductors short and well-organized to avoid heat buildup or accidental disconnections. - 5
Make final connections and secure enclosures
Apply approved connectors, replace covers, and ensure the enclosure remains accessible for future service. Double-check that all terminals are tight and that there is no damaged insulation.
Tip: Label the circuit clearly at the panel to aid future maintenance. - 6
Restore power and test functionality
Turn the breaker back on and verify the thermostat powers up. Test heating by setting a few target temperatures and observing response from the baseboards. Monitor for any abnormal sounds or heat hotspots.
Tip: Test under normal room conditions to simulate typical use. - 7
Evaluate performance and refine
Assess comfort levels and energy usage over several days. Adjust scheduling, setback temperatures, and zoning if needed. Keep documentation of settings for future reference.
Tip: Consider insulating spaces better to maximize efficiency alongside the new control method.
Questions & Answers
Can I connect a standard smart thermostat directly to electric baseboard heat?
No. Baseboard heat runs on line voltage, while standard smart thermostats operate on low voltage. A direct connection can damage equipment and create safety hazards. Use a line-voltage control or a relay kit designed for baseboard heating.
No. Baseboard heaters use line voltage, so you need a proper line-voltage control or a relay kit to run a smart thermostat safely.
What is required to use a smart thermostat with baseboard heat?
You’ll typically need a line-voltage thermostat or a relay module that translates the smart thermostat’s low-voltage signal into a safe high-voltage switch for the baseboard circuit. Verify voltage ratings and load before buying.
You generally need a line-voltage thermostat or a relay module to safely control baseboard heat with a smart thermostat.
Are there smart thermostats designed for line-voltage heat?
Yes, some models are designed specifically for line-voltage systems. They are less common and can be more expensive, but they simplify wiring and safety by providing built-in high-voltage control.
There are a few smart thermostats made for line-voltage heating, though they’re not as common and may cost more.
Do I need an electrician to install baseboard thermostat?
If you’re working with line voltage, many jurisdictions require a licensed electrician for code compliance and safety. Even when DIY is allowed, professional help is wise for safe, reliable results.
For work on line voltage, it’s wise to hire a licensed electrician to meet safety and code requirements.
Will upgrading to a smart control save energy with baseboard heat?
Smart control can improve scheduling and comfort, potentially reducing wasted heating. Savings depend on insulation, zoning, and usage patterns, not just the thermostat itself.
Upgrading can help with scheduling and comfort, and may save energy depending on insulation and usage.
Is Nest or Ecobee compatible with baseboard heat?
Most models don’t directly control baseboard heat. You’ll typically need a relay or a line-voltage thermostat that’s compatible with those brands’ tech. Always check the product’s wiring diagrams before purchasing.
Nests and Ecobees usually don’t directly control baseboard heat; you’ll need a relay or line-voltage solution.
Watch Video
What to Remember
- Confirm voltage type before purchasing hardware.
- Use a dedicated line-voltage thermostat or a relay‑based solution.
- Always shut off power and test before handling wiring.
- Consult a professional if in doubt about code compliance.
- A proper interface improves safety and reliability.