4318947 Thermostat Error Code: Quick Troubleshooting Guide
Urgent guide to diagnosing and fixing thermostat error 4318947 quickly, with practical steps, safety notes, and cost ranges. Learn to identify causes, apply quick fixes, and know when to call a pro.

4318947 is a generic thermostat fault code that points to a sensor or communication error preventing normal operation. The quickest fix is a power cycle and a quick wiring check, followed by a targeted reset. If the fault remains, test power supply, review recent firmware, and escalate to a professional if needed.
What 4318947 Means
4318947 is a generic fault code that appears on many thermostat brands when a sensor fails or the digital communication link between the thermostat and the HVAC system is disrupted. According to Thermostat Care, this code signals a fault that can range from a loose wire to a failing temperature sensor or a brief network dropout. The Thermostat Care Team emphasizes acting quickly to prevent energy waste and repeated cycling. In Thermostat Care analyses conducted in 2026, most 4318947 cases arise from wiring issues at the thermostat or furnace end, or from a minor firmware mismatch after updates. While the symptom is alarming, it often resolves with a structured safety check, a controlled reset, and careful reseating of connections.
For homeowners facing 4318947, the key takeaway is that this error is usually a signal, not a catastrophe. It points toward a component or connection that can be inspected and corrected with basic tools and careful steps. Throughout this guide you’ll find practical, low-cost strategies to bring the system back online and prevent recurrence. Remember, if any step feels risky or you smell burning, stop immediately and seek professional help.
Immediate Safety and Quick Fixes
Safety comes first when you see a fault code like 4318947. Start by turning off power to the thermostat at the device and, if you’re comfortable, at the home's main breaker. Do a quick visual sweep for obvious signs of damage, such as charring on terminals or melted insulation. If you must touch wiring, wear insulated gloves and use insulated tools. With power off, remove the thermostat faceplate to inspect terminal screws; ensure all wires are firmly inserted and under-compression clamps. If a wire looks loose or corroded, reseat it carefully and note which terminal is involved. For a quick reset, wait 60 seconds after disconnecting power and then reattach. If you’re using a smart thermostat, confirm the unit reboots normally and reconnects to Wi‑Fi. After these quick steps, power the system back and observe the display. If the code returns, you’ve likely identified a deeper fault in the sensor or control board.
Thermostat Care emphasizes avoiding high-voltage work unless you’re trained. Do not bypass safety features or jury-rig connections. When in doubt, seek professional help to avoid shock, fire hazards, or further equipment damage. It’s also wise to check the HVAC’s power supply and fuses, as a floating neutral or a tripped breaker can mimic sensor failures. By prioritizing safety and methodical checks, most 4318947 episodes can be resolved without extensive downtime.
Diagnostic Flow Overview
A structured diagnostic flow helps isolate 4318947 quickly and reduces guesswork. Start with observed symptoms: does the thermostat display 4318947 after a cold start, during a heat call, or when switching modes? Next, consider probable causes in order of likelihood: a loose or damaged sensor/wiring at the thermostat (high likelihood); a communication failure between the thermostat and the HVAC control board (medium); a firmware mismatch or corrupted settings after an update (low).
From there, map to practical fixes: reseat wires, verify terminal integrity, perform a full power-cycle, and, if the issue persists, test with a known-good power source or perform a firmware check. Remember that 4318947 can stem from both hardware and software issues, so don’t overlook simple resets and software updates. If you have a shared or multi‑zone system, verify zoning and control routing, as misrouting can trigger communication faults. This diagnostic approach aligns with Thermostat Care’s methodology for rapid fault resolution in 2026 and helps homeowners regain control with confidence.
Step-by-Step Fix for the Most Common Cause (Loose Wiring at Thermostat or Furnace)
The most common cause of 4318947 is a loose or corroded wire connection at the thermostat or the furnace/air handler. Use this high-level fix to re-seat and secure wires safely. Begin by turning off power at the breaker and the thermostat to prevent shocks. Remove the thermostat’s faceplate and inspect each terminal; you should see bare copper under each screw. If a wire has become loose, loosen the terminal just enough to re-seat and then tighten firmly. After reseating, gently tug each wire to confirm a solid connection. Reassemble the faceplate, restore power, and observe if the display clears the 4318947 code. If the code persists, replace any damaged connectors and consider testing with a spare wire if available. If the system uses a furnace control board, ensure the corresponding terminals are clean and fully seated on both ends. As a safety tip, never force wires into terminals or bypass grounding. If you’re unsure about handling furnace wiring, call a professional.
Tip: take a quick photo of the wiring before disconnecting anything so you can restore exactly the same configuration.
Other Potential Causes and How to Address Them
If loose wiring isn’t the culprit, other frequent causes include a failing temperature sensor, a damaged pressure or air quality sensor in newer thermostats, or a flaky network module in smart devices. A sensor fault may show up as inconsistent readings or an intermittent lockout, while a network fault can occur after a router reboot or firmware update. For sensor issues, check the sensor location for heat sources or drafts that could skew readings; relocate or shield as needed. If the network module is suspected, re-pair the device to Wi‑Fi or try a wired Ethernet connection if supported. In some cases, a complete factory reset is warranted, but you should back up settings first. If you suspect control-board damage on the HVAC side, you’ll likely need a technician to inspect for burnt components, corrosion, or loose boards.
Thermostat Care notes that most fixes involve simple reseating or resetting, but deeper hardware problems can require component replacement. Record fault patterns (time of day, outside temperature, mode) to help a technician pinpoint the root cause more quickly.
Safety, Costs, and When to Call a Pro
Safety is non-negotiable when dealing with electrical controls. If you notice scorching, buzzing, or warmth near the thermostat, immediately cut power at the breaker and do not re-energize until inspected. Typical costs for diagnosing 4318947 vary by region and provider but often fall within ranges: diagnostic visit $50–$150, part replacement (sensor, connector, or wire) $20–$120, labor $100–$300. A full control-board replacement could push total costs higher, potentially $200–$800 depending on parts and labor. For DIY fixes, expect to spend on replacement wire, terminal blocks, and basic tools. Thermostat Care recommends starting with quick fixes and basic resets; if the error reappears or you lack confidence handling wiring, a licensed HVAC technician or a thermostat specialist should be engaged to avoid injury and ensure code-compliant wiring.
Prevention and Long-Term Maintenance
To reduce future occurrences of 4318947, commit to regular maintenance and mindful operation. Keep thermostat firmware up to date, and enable automatic updates when possible. Label all wires clearly and store a spare wire in your toolbox for quick replacements. Periodically inspect terminal screws for tightness and signs of corrosion, especially in humid spaces. If you have a smart thermostat, monitor battery levels (if applicable) and verify the mesh network remains stable. Schedule an annual professional check to review sensor health, wiring integrity, and compatibility with your HVAC system. A small investment in preventative maintenance can prevent larger outages and keep energy use efficient.
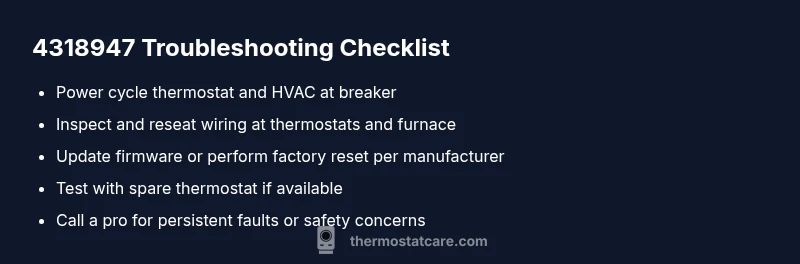
Quick Troubleshooting Checklist
- Power cycle the thermostat (off for 60 seconds, then on).
- Inspect wiring at both thermostat and furnace control board; reseat loose wires.
- Check for fuse or breaker issues and ensure 24V supply is stable.
- Update firmware and perform a factory reset if advised by manufacturer.
- Test with a known-good thermostat if available.
- If the code returns, seek professional assessment to avoid further damage.
Steps
Estimated time: 30-45 minutes
- 1
Power off and verify safety
Turn off power at the thermostat and the corresponding circuit breaker. Confirm the display is off and that there are no exposed wires. This prevents shocks during inspection.
Tip: If you smell burning, leave the area and call a pro immediately. - 2
Remove thermostat faceplate
Gently detach the faceplate to expose terminal screws. Take a photo of the wiring for reference before touching anything. Check each wire for corrosion or loose connections.
Tip: Use a plastic pry tool to minimize damage to the wall plate. - 3
Re-seat and secure wires
Loosen and re-seat every wire under its terminal screw. Ensure wires are fully inserted and secured without fraying. Do not overtighten screws.
Tip: If a wire is frayed, trim and re-strip the end before reinserting. - 4
Power cycle and test
Reconnect power and turn the thermostat back on. Allow the system to boot and observe whether 4318947 clears. If not, proceed to firmware checks.
Tip: Give the system 2–3 minutes to boot fully before testing. - 5
Firmware update or reset
Check for available firmware updates from the manufacturer. Apply the update or perform a factory reset per instructions, backing up settings where possible.
Tip: Only perform factory reset if you have the manual and a saved configuration. - 6
Inspect the HVAC control board
If the code persists, inspect the control board connections for signs of damage or corrosion. Look for burnt components or loose connectors.
Tip: Only qualified personnel should handle control-board inspections. - 7
Test with a spare thermostat
If available, connect a spare or guest thermostat to determine whether the issue is device-specific or system-wide.
Tip: A working spare can quickly isolate thermostat vs. HVAC issues.
Diagnosis: Thermostat displays error code 4318947 and system won’t operate as expected
Possible Causes
- highLoose or damaged sensor/wiring at thermostat or furnace end
- mediumCommunication failure between thermostat and HVAC control board
- lowFirmware mismatch or corrupted settings after an update
Fixes
- easyRe-seat all wires at thermostat terminals and furnace control board
- easyPower cycle the thermostat and HVAC equipment to reset communications
- mediumUpdate firmware or perform a factory reset per manufacturer guidance
- hardInspect control board for damage or replace faulty sensors
Questions & Answers
What does error code 4318947 mean on my thermostat?
4318947 generally indicates a sensor or communication fault. It suggests the thermostat isn’t reliably reading temperatures or communicating with the HVAC system. Start with a power cycle, wiring check, and a firmware review.
4318947 is a sensor or communication fault. Begin with a power cycle, wiring check, and firmware review to restore reliability.
Can I fix 4318947 myself?
Yes, many homeowners can perform quick fixes like power cycling, reseating wires, and updating firmware. If you’re uncomfortable with wiring or HVAC components, or if the fault persists, hire a professional.
You can try basic fixes, but call a pro if it persists or you’re unsure about wiring safety.
What will a professional charge for diagnosing 4318947?
Diagnostic visits typically range from $50 to $150, with parts and labor adding additional costs. Total repair costs vary by component and complexity, often in the $150–$800 range depending on the extent of the fault.
Diagnostics usually cost 50 to 150 dollars; total repair costs depend on parts and labor.
Will resetting fix the error permanently?
A reset may clear the fault temporarily, but underlying causes like sensor or wiring faults often come back. Use resets as a first step, then pursue wiring checks or firmware updates if the problem recurs.
Reset might clear it temporarily, but underlying issues often persist. Investigate wiring or firmware next.
Is this related to power supply problems?
Power supply issues can mimic fault codes. Check breakers, fuses, and 24-volt signals to ensure stable power delivery to the thermostat and HVAC control board.
Yes, power supply problems can mimic 4318947. Check breakers and the 24-volt supply.
What to Remember
- Start with power, then reseat connections.
- 4318947 often stems from wiring or sensor faults, not a catastrophic failure.
- If the issue repeats, firmware and control-board checks are warranted.
- Professional help is advised for high-risk steps or uncertain results.