Where to Install Thermostatic Mixing Valve: A DIY Guide
Learn where to install a thermostatic mixing valve (TMV) to safely regulate water temperature, reduce scald risk, and meet code. A practical, step-by-step guide for homeowners and DIY enthusiasts.

Definition: A thermostatic mixing valve should be installed on the hot water supply at or near the point of use to regulate temperature before it reaches fixtures. For most homes, place TMV at the shower/tub supply or immediately after the water heater for whole-house protection; local codes apply. Consult your local authority and consider professional help if needed.
Why placement matters for safety and code compliance
According to Thermostat Care, the placement of a thermostatic mixing valve (TMV) directly influences both safety and compliance with local codes. A TMV’s job is to blend hot and cold water to a preset, safe temperature, typically around 120°F (49°C) in many regions. When a valve sits too far from the point of use, variations in hot-water demand across different floors or fixtures can cause sudden temperature swings. In homes with undersized piping or long runs, a mislocated TMV may fail to protect against scalding where it matters most. Thermostat Care’s analysis emphasizes that correct placement reduces burn injuries for children and seniors and helps meet building-code requirements, which can vary by city or state.
Remember: your local plumbing code is the ultimate guide. If you’re unsure about code specifics or your home’s layout, treat TMV placement as a safety retrofit and consult a licensed plumber. This decision isn’t just about comfort; it’s about consistent, safe temperatures at every faucet.
Key takeaway: Proper TMV placement is essential for safety, efficiency, and code compliance. Keep the valve close to the fixture or on the main hot line where temperature control is most needed.
Key locations for TMV installation
When deciding where to install a thermostatic mixing valve, the location should minimize the distance hot water travels before mixing, which reduces temperature drift and scald risk. The most common placements are at the hot-water outlet of the water heater for whole-house protection, and at the supply line to a shower or tub for point-of-use protection. In multi-story homes, installers often place TMVs on the shortest hot-water run that serves the highest-risk fixtures, such as children’s bathrooms or elderly-access bathrooms. In outdoor or auxiliary fixtures, a separate TMV can prevent scalding on those taps as well.
Other considerations include the age and material of piping (copper, PEX, or CPVC), the presence of backflow preventers, and existing shut-off valves. If you’re retrofitting, identify the nearest convenient shut-off to minimize disruption and isolate the TMV during installation. By placing the TMV near the point of use, you’ll provide immediate protection to the user and simplify future maintenance.
Tip: If your home has a central hot-water loop, a TMV can be installed at the loop’s supply to extend safety across multiple bathrooms with a single valve.
Whole-house vs. point-of-use TMV: pros and cons
Choosing between a whole-house TMV and point-of-use TMVs depends on safety goals, budget, and plumbing layout. Whole-house TMVs protect every outlet, ensuring safe water temperature at every faucet, which is helpful in households with young children, elderly residents, or sensitive skin. Point-of-use TMVs concentrate protection at critical fixtures like showers and bathtubs, typically at a lower cost and with less disruption to existing piping.
Pros of whole-house TMV:
- Consistent temperature across all fixtures
- Fewer individual install points, which may simplify future maintenance
- Strong safety enhancement for families with young children
Pros of point-of-use TMV:
- Lower upfront cost and less invasive installation
- Faster installation, especially in larger homes where running new lines is complex
- Targeted protection for high-risk areas
Thermostat Care notes that for most families, a combination approach—point-of-use TMVs at showers and a main TMV on the hot-line—offers robust protection without excessive expense. Always verify compatibility with your hot-water system and local requirements.
Plumbing prep: what to check before installation
Before mounting a TMV, perform a quick checklist to avoid common installation pitfalls. Confirm main shut-off accessibility so you can isolate the hot-water line during work. Inspect existing fittings for corrosion or leakage; replace worn adapters and ensure copper, PEX, or CPVC piping is clean and free of debris. Gather the proper tools and space to work, as cramped crawlspaces or finished walls can complicate the install.
If you’re retrofitting an existing system, document the routing of hot and cold lines, noting any rigid segments that require additional support. Plan for a short service interruption and arrange towels or a bucket for residual water. When you’re ready, turn off the cold-water supply to the heater to prevent backflow during the installation.
Safety note: TMVs involve hot water and plumbing fittings under pressure. Use protective gear, and avoid trying to force fittings or modify piping beyond the valve’s intended connections.
Step-by-step: overview of installing a thermostatic mixing valve (overview, not a substitute for the detailed steps)
This section provides a high-level view of the process and should be read before diving into the detailed, step-by-step instructions. Expect to work with copper or PEX piping, adhesive or compression fittings, and a few threaded adapters that match your TMV model. The installation requires careful alignment of hot and cold inlets, proper sealing with thread tape, and a thorough leak test at the end.
For a successful result, plan for at least 60–180 minutes, depending on your piping layout and whether you’re replacing an old valve or adding a new protection point. If you encounter unusual pipe configurations or lack essential tools, consider pausing the project and consulting a plumber.
Prep recap: identify the install location, ensure shut-off valves are accessible, and have replacement fittings ready.
Safety, testing, and initial operation after installation
After mounting the TMV, perform a build-up test to ensure the hot-water line is correctly mixing and that the outlet temperature is within a safe range. Check all connections for leaks using a licensed leak-detection method or soapy water. Once confidence is achieved, re-pressurize the system and run several fixtures to confirm consistent temperatures.
If you notice any drift in temperature after the first test, re-torque fittings and verify that the valve is oriented correctly for the hot and cold lines. Some systems may require a short break-in period for new cartridges to seat properly.
Maintenance should include periodic temperature checks, annual inspections after major plumbing work, and replacement of worn seals per the manufacturer’s guidance.
Local codes, permits, and hiring a pro
Your local jurisdiction may require a permit or inspection when installing a TMV. Even if a permit isn’t required, a licensed plumber can ensure proper alignment, sealing, and venting where necessary. Always consult your local building department before beginning major plumbing work. Document the installation with photos and notes for future reference or inspections.
If you’re in a rental property or a home with intricate plumbing, professional installation is often the safer route. The TMV is a critical safety device; errors in installation may lead to leaks, improper temperatures, or non-compliance with codes.
Cost considerations, time estimates, and decision points
Estimates for TMV installation vary based on whether you’re retrofitting or adding a new protection point, the complexity of the piping, and local labor rates. Material costs for a basic TMV kit and adapters typically fall within a moderate range, while professional installation can add a substantial portion of the total cost. It’s reasonable to budget for parts, fittings, and labor across a broad range to accommodate differences in home layout and regional pricing.
To balance safety and budget, many homeowners opt for a mid-range approach: a single point-of-use TMV near the most-utilized bathroom, complemented by a main TMV at the heater outlet if your home has a higher risk profile (children, elderly, or multi-story plumbing).
Verification, troubleshooting, and long-term care
Once installed, schedule a routine check every 12–24 months to verify the mixed-water temperature, seals, and mounting integrity. If you notice inconsistent temperatures across fixtures, re-check piping runs and valve orientation. Keep spare adapters and cartridge seals on hand, as replacements can minimize downtime during maintenance.
Troubleshooting tips:
- If the temperature is too high, verify the TMV is correctly calibrated and that hot water supply isn’t blocked by debris or a closed valve.
- If the cold side seems weak, ensure cold supply lines are fully open and not restricted by a clogged filter.
- If leaks appear, tighten connections gradually and replace worn gaskets.
Safety, maintenance, and best practices (final reminders)
Prioritize safety by ensuring all work is performed with the water shut off and the system depressurized. Record the installation details for future reference and code audits. Remember that local guidelines and building codes govern valve placement and permitted modifications. If you’re unsure, hire a pro. The aim is a reliable, safe, and code-compliant installation that protects every user of your home’s water system.
Tools & Materials
- TMV installation kit (valve body, cartridge, adapters)(Choose compatible model and fittings for copper or PEX/CPVC piping)
- Adjustable wrench(For securing nuts and connections; use a backup wrench to avoid overtightening)
- Pipe cutter or saw(Copper pipes require a pipe cutter; PEX uses a dedicated tool)
- PTFE thread seal tape (Teflon tape)(Wrap 2-3 times in the direction of the connection for a seal)
- Shut-off valves (hot and cold)(Close-by valves simplify future maintenance and testing)
- Leak-detection solution or soap & water(Check for leaks after testing)
- Temperature gauge or calibrated thermometer(Verify outlet temperature at multiple fixtures)
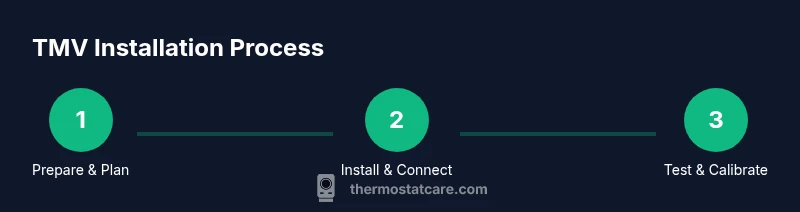
Steps
Estimated time: 90-180 minutes
- 1
Shut off water and relieve pressure
Locate and close the main shut-off valve and the local shut-offs feeding the hot water line. Open a nearby faucet to relieve residual pressure and drain a small amount of water so you can work without pressure surges.
Tip: Use a bucket and rags; depressurize slowly to avoid splashes. - 2
Identify install location
Choose a point on the hot-water line where the TMV will be most effective at the intended fixtures. If you’re protecting multiple fixtures, plan the run to the shortest, least obstructed route. Confirm there’s adequate space for valve access and future service.
Tip: Take a quick photo or sketch of the current piping before removing anything. - 3
Prepare piping and shut-off valves
Install or verify shut-offs close to the TMV location, ensuring clean, accessible pipe ends. Dry-fit the valve and adapters to confirm alignment with hot and cold lines.
Tip: Use a marker to indicate which side is hot and which is cold to avoid misassembly. - 4
Mount TMV and attach fittings
Mount the TMV body in its intended orientation, then attach adapters and fittings per the manufacturer’s instructions. Apply PTFE tape to threaded connections and tighten securely, avoiding overtightening.
Tip: Cross-check manufacturer torque specs if provided. - 5
Connect hot and cold supplies
Connect the hot line to the TMV hot port and the cold line to the TMV cold port. Attach the mixed output to the fixture’s supply line or the distribution line as designed.
Tip: Ensure the hot and cold lines are not reversed; incorrect orientation affects temperature control. - 6
Test and calibrate
Turn the water back on and slowly open valves. Check for leaks and measure outlet temperatures at multiple fixtures. Adjust the valve setting if needed to reach your target temperature.
Tip: Use a thermometer at the most frequently used fixture to set a safe baseline (commonly around 120°F/49°C). - 7
Document and maintain
Record the installation details, including model number, date, and any calibration settings. Schedule regular inspections and keep spare o-rings or gaskets on hand for quick maintenance.
Tip: Create a simple maintenance log to simplify future audits.
Questions & Answers
What is a thermostatic mixing valve (TMV)?
A TMV blends hot and cold water to a preset, safe temperature to prevent scalding at taps and showers.
A thermostatic mixing valve blends hot and cold water to a safe, set temperature to prevent scalding.
Where should a TMV be installed in a home?
Typically on the hot-water line near the point of use or after the water heater for whole-house protection, depending on safety goals and local codes.
Usually on the hot-water line near the fixtures, or after the heater for whole-house protection, depending on local rules.
Do I need a permit to install a TMV?
Permit requirements vary by locale. Check with your local building department and follow their guidance before starting work.
Permit rules depend on your area; verify with the local building department before starting.
Can a DIY install be safe and effective?
If you have plumbing experience and follow the manufacturer’s instructions, a DIY install can work. For complex layouts, hire a professional.
A DIY install can work if you’re comfortable with plumbing and follow the guide; complex layouts are better left to pros.
What maintenance does a TMV require?
Periodically check temperature accuracy, inspect seals, and replace worn parts per manufacturer recommendations.
Maintain by checking temperature and seals regularly and replacing worn parts as advised.
How do I verify temperature after installation?
Use a thermometer at multiple fixtures to confirm a safe, consistent temperature; adjust as needed.
Test with a thermometer at several fixtures to ensure a safe, consistent temp.
Watch Video
What to Remember
- Place TMV close to fixtures or on the hot-line for best safety.
- Choose whole-house, point-of-use, or a combination based on layout and risk.
- Follow local codes and consider professional installation when in doubt.
- Test temperatures at several fixtures and maintain the valve regularly.