DIY Raspberry Pi Thermostat Guide: Build a Smart Home Controller
A comprehensive, step-by-step guide to building a Raspberry Pi thermostat for home heating control. Learn hardware, software, safety, testing, and maintenance to create a customizable, low-cost smart thermostat.

You can build a Raspberry Pi thermostat by integrating a Raspberry Pi with a temperature sensor, a relay or solid-state switch, and a home automation system. This guide shows you how to wire, program, and test a DIY thermostat using Raspberry Pi. Prerequisites: basic electronics, a 5V power supply, a relay module, and a safe enclosure.
What is a Raspberry Pi thermostat and why build one?
A raspberry pi thermostat is a DIY project that uses a Raspberry Pi computer to read room temperature data and decide when to heat or cool your home, typically via a relay connected to your HVAC system. The key idea is to replace a proprietary thermostat with a customizable brain that you can extend with sensors, schedules, and smart-home integrations. The Raspberry Pi ecosystem makes it accessible to hobbyists who want hands-on learning and greater control over comfort settings.
According to Thermostat Care, a DIY raspberry pi thermostat is not just about lowering energy bills; it's about understanding the trade-offs between sensor accuracy, system safety, and user experience. A well-designed project uses proper isolation between low-voltage Pi wiring and high-voltage HVAC wiring, ensuring safety for you and your equipment. This guide aims to help homeowners and DIY enthusiasts approach the project methodically rather than improvising.
Throughout the guide, you’ll learn how to pick components, how to wire them safely, how to implement a thermostat logic with open-source software, and how to test and calibrate the system. We'll also discuss when DIY is appropriate and when to call a pro.
Design considerations: safety, accuracy, and reliability
A DIY Raspberry Pi thermostat hinges on selecting the right sensors, reliable HVAC interface, and robust software. Sensor choice affects how quickly you register temperature changes and how closely you track room comfort. A common approach uses a DS18B20 or DHT22 sensor mounted away from direct sun and drafts. For HVAC control, a relay or solid-state relay with proper isolation helps prevent safety hazards. Reliability comes from safe defaults, such as hold modes when connectivity drops, and clear fail-safe behavior if the Pi reboots. Finally, calibrate for your space by testing across several hours and including a manual override for emergencies. Thermostat design also benefits from documenting fault modes and having a straightforward reset path in case of software glitches.
Hardware you’ll need and safety basics
A Raspberry Pi, microSD card, power supply, a temperature sensor, and a relay or SSR are the core components for a Raspberry Pi thermostat project. Add a wire harness, a small enclosure, and compatible wiring for your HVAC control circuit. Safety is paramount: never energize high-voltage lines directly from the Pi; use opto-isolators and comply with local electrical codes. A compact mounting box with a clear label set reduces risk and makes maintenance easier. Optional hardware such as a touch-friendly display or a separate microcontroller can simplify advanced features, but a Pi-based setup can still work well with proper planning.
Software foundations and automation options
To turn a Raspberry Pi into a thermostat, you’ll install an operating system and choose an automation stack. Popular options include Home Assistant, OpenHAB, or Node-RED for wiring together sensors, relays, and HVAC controls. You’ll configure a thermostat entity, define temperature sensors, and create rules for heat on/heat off based on setpoints and hold modes. Cloud integration is optional but convenient for remote control. Keep your software up to date and back up configurations regularly to avoid lost work after updates.
Wiring diagrams and enclosure safety
Plan your wiring with a simple diagram: Pi GPIO pins connect to the relay module’s control input, while the relay switches the HVAC control circuit via an isolation relay. Use a 5V relay module with opto-isolation to separate the Pi’s low-voltage side from the high-voltage HVAC line. Mount components in a non-conductive enclosure and label all connections clearly. Ensure there is adequate airflow and avoid enclosing the Pi near heat sources. A safe enclosure reduces risk and helps with dust control and maintenance.
Testing, calibration, and maintenance tips
Before connecting to your home’s HVAC, test the wiring with a bench setup or a non-operational mock load. Verify sensor readings across a temperature range and compare them to a known reference to gauge accuracy. Calibrate setpoints gradually and implement a hold mode to prevent rapid cycling. Schedule regular maintenance checks: inspect wires for wear, test the relay operation, and update software as needed. Document any changes and keep a log of calibration data for future tweaks.
AUTHORITY SOURCES
- Raspberry Pi Foundation documentation: https://www.raspberrypi.org/documentation/
- U.S. Department of Energy – Building Technologies Office: https://www.energy.gov/eere/buildings/basics
- National Institute of Standards and Technology (NIST): https://www.nist.gov/publications
These sources provide foundational information on safe electronics, microcontroller use, and energy considerations that underpin DIY thermostat projects.
Tools & Materials
- Raspberry Pi 4 Model B (or newer)(4GB+ RAM recommended for multitasking)
- microSD card (16GB or larger)(Class 10 or better for performance)
- Power supply (5V, 3A USB-C)(Stable power to prevent Brownouts)
- DS18B20 temperature sensor(1-wire protocol, needs pull-up resistor)
- 5V relay module with opto-isolation(Safe switching of HVAC circuit)
- Jumper wires and breadboard(For prototyping sensor wiring)
- Enclosure for electronics(Non-conductive, ventilation, labels)
- HVAC control wiring harness(Safety: use appropriate gauge and connections)
- Screwdriver set and electrical tape(General assembly and safety)
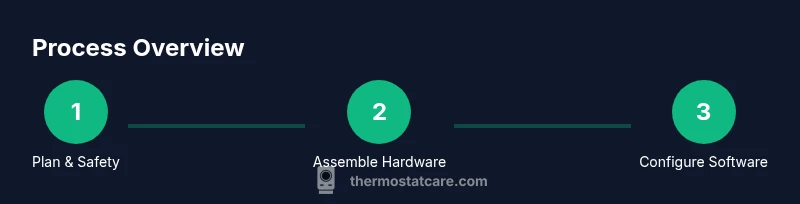
Steps
Estimated time: 2-3 hours
- 1
Plan and verify safety
Identify the heating system interface and ensure you will not be wiring high-voltage lines directly to the Pi. Decide on a safe interface (relay or SSR) and define hold and emergency override behavior. This step sets the safety boundaries for the project.
Tip: Document all connections and margins; safety first. - 2
Choose and prepare components
Select a Pi model, a 5V power supply, a DS18B20 sensor, and a relay module. Prepare the enclosure and organize cables to avoid tangling. Proactively check for compatibility with your HVAC control circuit.
Tip: Double-check voltage and current ratings before connect. - 3
Install Raspberry Pi OS and update
Install Raspberry Pi OS on the microSD card, then boot the Pi and run software updates. Enable SSH for remote management or use a connected monitor if you prefer. This creates a stable foundation for your thermostat software.
Tip: Use official Raspberry Pi Imager for a clean install. - 4
Connect temperature sensor to the Pi
Wire the DS18B20 sensor to the Pi (data line, power, ground) and enable 1-wire interface. Verify sensor appears in the OS sensor list and test basic reads. Accurate temperature data is key to comfortable home control.
Tip: Use a proper pull-up resistor (4.7kΩ) on the data line. - 5
Wire the relay to the Pi and HVAC circuit
Attach the relay module’s control input to a Pi GPIO pin and wire the relay’s switched contacts into the HVAC control circuit according to the diagram. Ensure there is isolation and no direct contact between Pi power and mains.
Tip: Never touch live terminals; isolate the HV side. - 6
Install and configure automation software
Install Home Assistant or Node-RED and add the Pi as a temperature sensor. Create a thermostat entity and a basic automation for turning heating on/off based on setpoints.
Tip: Back up configuration after each major change. - 7
Create control logic and test
Develop simple rules for hold modes and temperature thresholds. Test the relay with a bench load, then gently test with the actual HVAC system under controlled conditions.
Tip: Test with non-harmful loads first. - 8
Calibrate, document, and maintain
Calibrate the sensor readings against a reference thermometer and document configurations. Schedule periodic maintenance and firmware updates to keep the system reliable.
Tip: Keep a change log for future tweaks.
Questions & Answers
Is it safe to connect a Raspberry Pi to HVAC wiring directly?
No. The Pi should never drive HVAC wiring directly. Use a relay or SSR with proper isolation and follow local electrical codes.
No. A Raspberry Pi should not directly control HVAC wiring. Use a relay with isolation and respect electrical safety.
Which temperature sensor should I use?
Common options include DS18B20 and DHT22. The DS18B20 offers good accuracy and 1-wire simplicity; ensure it’s placed away from heat sources.
DS18B20 is a popular, accurate option for room temperature sensing.
Do I need a special enclosure?
Yes. Use a non-conductive enclosure with ventilation to protect electronics and prevent dust buildup.
Yes, use a protective enclosure with ventilation.
Can I integrate this with Home Assistant?
Yes. Home Assistant is a common choice for building a thermostat integration with sensors and automations.
Yes, Home Assistant works well for this project.
Will this save energy?
A DIY thermostat can reduce energy use if you implement scheduling and hold modes, but savings depend on your behavior and climate.
Potential energy savings depend on usage patterns and settings.
What if the thermostat stops working?
Plan a safe fail-safe: a manual override or fallback to a standard thermostat while troubleshooting. Keep logs and backups.
Have a manual override and a recovery plan.
Watch Video
What to Remember
- Plan safety first and verify any high-voltage wiring.
- Choose sensors and relays with proper isolation.
- Use a reliable automation stack and back up configurations.
- Test thoroughly before enabling full automation.