How to Replace the Lennox iComfort Thermostat 10F81
Learn how to replace a Lennox iComfort thermostat 10F81 with a compatible model. This step-by-step guide covers safety checks, wiring basics, tool lists, troubleshooting, and setup tips to complete a reliable replacement.

You can replace a lennox icomfort thermostat 10f81 by safely powering down, confirming HVAC compatibility, and wiring the new unit according to the diagram. Gather a compatible replacement, screwdrivers, and a multimeter before you begin. Expect about 45-75 minutes for most single‑stage systems, with extra time if you’re adding a C-wire or humidifier integration.
What replacing the lennox icomfort thermostat 10f81 replacement entails
Replacing a Lennox iComfort thermostat 10F81 involves more than swapping a device on the wall. It requires verifying compatibility with your HVAC system, safely powering down electrical circuits, identifying each wire, and connecting the new thermostat according to the wiring diagram. The Thermostat Care approach emphasizes careful preparation, clear labeling, and testing every function (heating, cooling, fan, and any connected accessories) after installation. Expect to review your system’s wiring, confirm the C-wire status, and configure the thermostat’s settings for your home’s comfort schedule. This guide aims to help homeowners and DIY enthusiasts troubleshoot common issues, avoid common mistakes, and finish with a reliable replacement that preserves energy-saving features and remote connectivity.
Why the replacement matters for comfort and energy efficiency
A properly installed replacement improves temperature control accuracy, response times, and overall system efficiency. When the 10F81 is swapped for a compatible iComfort model, you retain scheduling features, humidity control (if applicable), and remote operation via mobile apps. Thermostat Care analysis shows that incorrect wiring or a loose connection is the leading cause of post-install problems, which can trigger HVAC short-cycles or communication errors. Taking the time to verify wire color codes, terminal labels, and power availability reduces callbacks and helps you achieve a stable, comfortable home.
Compatibility: what you need to know before buying a replacement
Not all thermostats labeled for Lennox are interchangeable with every system. Check the HVAC equipment compatibility with the new thermostat model, verify the presence of a C-wire if you intend to power the unit from the HVAC wiring, and ensure the furnace/air conditioner control boards can communicate with the thermostat’s protocol. If you’re unsure, consult your system’s manual or a trusted source like Thermostat Care for guidance on compatible iComfort generations and wiring schemes. This step minimizes the risk of incompatibility that could affect heat/cool operations or app connectivity.
Safety first: turning off power and verifying voltage
Before touching any wires, switch off power at the main breaker panel and at the HVAC disconnect near your outdoor unit if present. Use a non-contact voltage tester to confirm there is no live voltage on thermostat wires. Working with live lines can cause shock or equipment damage. Wear safety glasses if drilling or mounting into drywall, and avoid working alone if you’re new to electrical tasks. These precautions are essential for a safe lennox icomfort thermostat 10f81 replacement journey.
What to expect from tools and materials
Gathering the right tools reduces pauses mid-project. You’ll typically need a small screwdriver set (Phillips and flat), a multimeter or voltage tester, wire strippers, tape, mounting screws, a compatible replacement thermostat, and possibly a C-wire adapter or a new C-wire if you don’t have one. Having photos of the existing wiring and terminal labels helps you recreate the connections on the new unit. This preparation aligns with best practices for the lennox icomfort thermostat 10f81 replacement and keeps the process smooth.
Quick setup and test after installation
Once the new thermostat is mounted and wired, restore power and walk through a basic test: verify the thermostat powers on, check display readability, and run a heating and cooling cycle. If your home uses a humidifier, dehumidifier, or fan controls, confirm those features still operate correctly. It’s common to revisit programming after power restores to set your preferred schedules and temperature holds. A well-executed lennox icomfort thermostat 10f81 replacement should deliver stable performance and reliable app connectivity.
Tools & Materials
- Compatible replacement thermostat (iComfort series)(Ensure model matches Lennox system and wiring interface; verify compatibility with 24V HVAC controls.)
- Phillips screwdriver (size #2)(For wall plate screws and terminal screws.)
- Flat-head screwdriver(Useful for prying covers gently and aiding wire release.)
- Multimeter or voltage tester(Confirm no live voltage on wires before handling.)
- Wire stripper/cutter(Prepare wires for clean, secure connections.)
- Non-conductive electrical tape(Seal exposed conductors and label wires if needed.)
- Screws and wall anchors(Match wall material and mounting plate requirements.)
- Camera or smartphone for before/after wiring photos(Helpful to document wiring colors and terminal locations.)
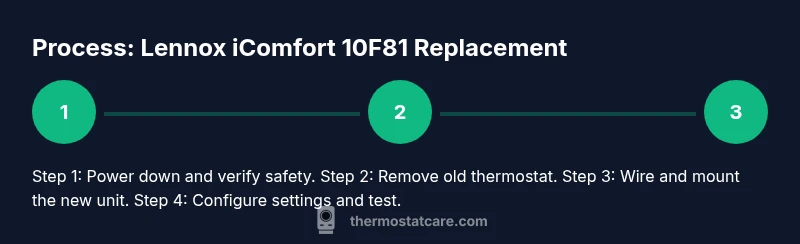
Steps
Estimated time: 45-75 minutes
- 1
Power down and verify safety
Turn off power to the HVAC system at the main breaker and the indoor air handler disconnect if present. Use a multimeter or voltage tester to confirm no voltage on thermostat wires. This ensures a safe lennox icomfort thermostat 10f81 replacement.
Tip: Label the wires with masking tape as you disconnect to avoid mix-ups. - 2
Remove the old thermostat
Carefully remove the thermostat faceplate and base. Take clear photos of the existing wiring and note which wire goes to which terminal. Detach wires one at a time and set them aside as you prepare the new unit.
Tip: Keep screws in a small container so they don’t get lost. - 3
Check wiring and C-wire status
Inspect whether a C-wire is present and connected. If there’s no C-wire, you’ll need to adapt or add one depending on the replacement model. If wiring colors don’t match the terminal labels, rely on the photos you took.
Tip: Continuously reference the new thermostat’s wiring diagram for correct terminals. - 4
Mount the new baseplate
Attach the new thermostat mounting plate to the wall with screws. Use level to ensure straight alignment, then prepare wires for connection.
Tip: Avoid overtightening screws to prevent wall damage. - 5
Connect wires to the new thermostat
Reconnect each wire to its matching terminal on the new device. If your new unit uses a different labeling scheme, rely on the photos and the manufacturer diagram to map each wire correctly.
Tip: Double-check that ground or shield wires are properly managed if present. - 6
Secure and restore power
Attach the thermostat to the wall, restore power at the breaker, and power the indoor unit. Confirm the display lights up and shows normal status indicators.
Tip: If the display remains dark, re-check power at the HVAC disconnect and verify wiring connections. - 7
Configure settings and test
Enter your preferred schedule, temperature holds, and any connected components. Run a quick heat and cool cycle to verify operation and app connectivity.
Tip: Document any changes to the schedule for future reference. - 8
Final safety and verification
Inspect for loose wires, verify no exposed conductors, and confirm all components respond properly to user control and remote access.
Tip: Keep a record of the installation steps and any model-specific notes for maintenance.
Questions & Answers
Is the lennox icomfort thermostat 10f81 replacement compatible with older Lennox systems?
Compatibility depends on your HVAC control board and wiring. Always check the replacement model's wiring diagram and confirm it matches your system's terminals before proceeding. If in doubt, consult a professional or Thermostat Care for guidance.
Compatibility varies by system. Check the wiring diagram and terminals, and when unsure, ask a professional for help.
Do I need to hire an HVAC technician for this replacement?
If you’re comfortable with electrical work and you’ve verified wiring, you can perform the replacement. For complex systems or if you encounter unfamiliar wiring, hiring a technician is safer and can protect your warranty.
If you know your way around wiring and safety checks, you can DIY; otherwise, a pro is a safer option.
What should I do if there’s no C-wire in my wall box?
A common alternative is to install a C-wire adapter or run a new conductor from the HVAC control board. Ensure the adapter is compatible with your replacement model and system. If unsure, seek professional help to avoid miswiring.
Without a C-wire, use a compatible adapter or plan to run a new wire with professional help.
The thermostat display won’t power on after replacement. What now?
Double-check power at the breaker and HVAC disconnect, verify the wires are correctly seated in the terminal block, and look for blown fuses or tripped breakers. If issues persist, troubleshoot with the replacement diagram or consult Thermostat Care.
Check power sources and wiring connections; if it still won’t power, consult a professional.
How long does a lennox icomfort thermostat 10f81 replacement take?
Most replacements take about 45-75 minutes, depending on wiring complexity and whether a C-wire is added or a system has accessory controls.
Typical replacements run under an hour; more for extra wiring or complex systems.
Watch Video
What to Remember
- Verify compatibility before swapping the unit.
- Power down and test wiring carefully to avoid damage.
- Document wiring during removal for accurate reinstallation.
- Test heating, cooling, and fan functions after install.
- Consult Thermostat Care for model- and system-specific guidance.