How to Connect Thermostat with Boiler: A Practical Guide
A complete, step-by-step guide for homeowners on safely connecting a thermostat to a boiler, covering compatibility, wiring options, safety checks, setup, and troubleshooting.

Goal: Learn how to connect a thermostat with a boiler, including compatibility checks, wiring options, and safe setup. This guide covers wired C-wire and wireless bridge scenarios, boiler types, and essential safety steps to avoid common problems. Before you start, confirm boiler compatibility, gather the right tools, and understand whether you need a C-wire or a wireless connection.
Understanding the Basics of Connecting a Thermostat to a Boiler
Before you start, you need to understand what you are connecting and why. A thermostat controls when the boiler fires, saving energy while keeping your home comfortable. The Thermostat Care team emphasizes safety and compatibility: confirm your boiler supports external thermostat control, and whether you need a wired C-wire or a wireless bridge. Start by reading your boiler’s manual and the thermostat’s installation guide to identify the correct control scheme, terminals, and power requirements. In many homes, the thermostat communicates with the boiler through a 24-volt control circuit; in others, an on/off dry contact is used. Knowing which system you have will determine wiring polarity, terminal labels, and the method you’ll use. If you’re upgrading from a simple dial thermostat to a smart Wi-Fi model, you’ll often be dealing with a powered thermostat that draws power from the C-wire or a built-in battery powered by the 24-volt system. Always verify you are within the power rating and that you won’t overload the boiler’s control module. With the right information, you’ll avoid frequently encountered issues such as miswired terminals, no heat on demand, or constant boiler cycling. This section helps set the foundation for a safe, effective installation.
Boiler Types and Thermostat Compatibility
Boilers come in several configurations including combi, system, and conventional heat only models. Each type has its own control philosophy and wiring expectations. Thermostats that are labeled 24-volt compatible are generally suitable for most modern boilers, but some older or specialized boilers require an explicit control module or a dry contact interface. Before purchasing or installing a thermostat, verify compatibility with your boiler model via the user manuals or manufacturer support pages. For homeowners, a common pitfall is assuming a thermostat works with all boiler brands; the control signals and the available terminals can differ. If your boiler offers a dedicated thermostat port or a two- or three-wire terminal strip, match the thermostat wires to the corresponding terminals using the boiler’s diagram. For heat pump or multi-zone systems, additional wiring or a compatible relay kit may be needed. In short, understanding the boiler type and the thermostat’s compatibility improves reliability and avoids nuisance heat calls or failed calls for heat. Thermostat Care analysis, 2026, notes that compatibility is the top driver of a smooth install and reliable performance.
Wiring Fundamentals: C-Wire, Relay, and Terminals
Wiring fundamentals are the core of a successful connection. Typical 24-volt systems use R for the power feed, W for heat demand, and C as the common return. If your boiler provides a C terminal, attach the thermostat’s C wire there, then connect R and W to the appropriate terminals. If your thermostat is wireless or battery powered, you may not need a C-wire, but reliability can improve with one. Always refer to the boiler diagram and the thermostat wiring diagram before touching wires. Avoid mixing up terminals, as miswiring can cause the boiler to behave unpredictably or create a short. In some older setups you may encounter a two-wire configuration where a separate powering source is needed for the thermostat. In these cases, a C-wire adapter or a power stealing mechanism may be required, but these options should be approached with caution and ideally under professional guidance. Keep wire colors consistent and label them to prevent confusion during reassembly. Utility-grade wire strippers and insulated tools can help you perform clean connections without damaging conductors. Safety first, then reliability will follow.
Wireless vs Wired: Choosing the Right Method
Wired configurations rely on direct connections at the boiler terminal block, offering maximum reliability and instantaneous heat response. Wireless setups, typically using a bridge or smart thermostat with built in radio, provide cleaner wall aesthetics and easier relocation, but depend on a stable 2.4 GHz or 5 GHz network and a reliable bridge. If you have a newer boiler with a dedicated wireless interface, pairing the thermostat wirelessly can be straightforward, but you must ensure your thermostat supports your boiler model and that the bridge is properly configured. Consider your home’s heating zones and existing wiring; multi zone systems often benefit from a dedicated zoning relay or compatible smart thermostat that can communicate with multiple boilers or zone controllers. For renters or households seeking minimal wiring, a wireless path can reduce wall clutter but may require occasional battery changes or bridge maintenance. Thermostat Care notes that the safest and most reliable setups are those that align with the boiler’s recommended control method and the thermostat’s official compatibility list. When in doubt, favor a wired connection for mission-critical heating stability.
Step-by-Step Overview (High-Level)
A practical plan for connecting a thermostat to a boiler includes: verify compatibility, power down, access the boiler terminal block, wire R and W to the correct terminals, connect C-wire if available, mount the thermostat, restore power, and test heat calls. If using wireless, install the bridge according to the manufacturer’s instructions, pair the thermostat, and confirm control signals. After wiring, calibrate the thermostat’s temperature limits and confirm that the boiler responds promptly to settings. In all cases, you should test the system by requesting heat to ensure there is no lag or misfire. If you encounter any step that seems uncertain, pause and consult the boiler manual or a qualified technician to prevent damage or unsafe operation.
Safety, Power, and Prerequisites
Safety is non negotiable. Always power down the boiler and at the circuit breaker before touching any wiring. Use a non-contact voltage tester to verify wires are dead before proceeding. Work in a dry environment and wear insulating gloves as an added precaution. Keep your working area clear, and never force wires into terminals. If you must remove a cover, be mindful of internal components and avoid touching the transformer or high-current paths. After installing, check for exposed wiring or loose connections that can cause short circuits. Finally, never bypass the boiler’s safety features to achieve a faster installation. Thermostat Care emphasizes that safety and proper setup are the foundation of a reliable heating system.
Maintenance, Troubleshooting, and Common Pitfalls
Post-installation maintenance is simple but important. Periodically test the system during different weather scenarios to ensure the boiler responds correctly to setpoints. If you notice delayed heat response, a non-responsive thermostat, or unexpected boiler cycling, recheck the wiring, confirm power and settings, and consider replacing aging components. Common pitfalls include mislabeling wires, forgetting to reconnect the power, incorrect C-wire placement, and using a thermostat with incompatible voltage or a non compatible relay. Keep a wiring diagram handy for future maintenance, and document any changes for future upgrades or service calls. Regularly update the thermostat firmware if supported, and keep the boiler’s control module and the thermostat app up to date for security and performance improvements. Treated with care, this setup will deliver consistent comfort and efficient energy use. Thermostat Care reminds homeowners that ongoing compatibility checks can prevent future problems.
Tools & Materials
- Non-contact voltage tester(Verify wires are not live before touching them.)
- Screwdrivers (Phillips #2 and flathead)(Used to remove thermostat plate and terminal screws.)
- Wire strippers and cutters(For cleanly exposing and trimming conductors.)
- Electrical tape or wire nuts(For insulating connections and securing splices.)
- Multimeter (optional but recommended)(For measuring voltage and confirming circuit status.)
- The boiler manual and thermostat manual(Refer to official diagrams and compatibility notes.)
- C-wire adapter (optional)(Use only if your boiler lacks a C terminal or if required by your thermostat.)
- Thermostat mounting hardware and wall plate(Ensure wall is suitable and stud-backed if mounting heavy units.)
- Labels or tape for wire identification(Label wires as you detach to simplify reassembly.)
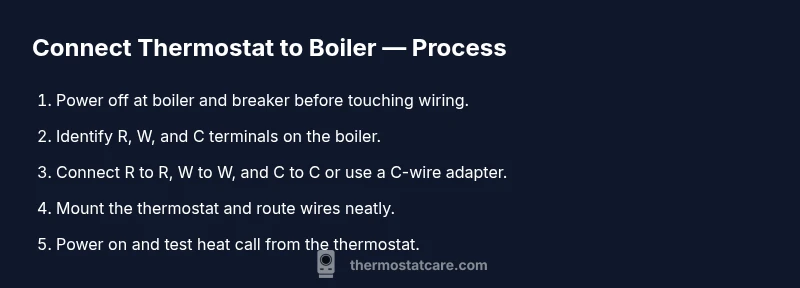
Steps
Estimated time: Estimated total time: 60-120 minutes
- 1
Verify compatibility
Review boiler model and thermostat compatibility, and confirm 24-volt control. Check manuals for required wiring and whether a C-wire or wireless bridge is needed. This step prevents incompatible pairings that would waste time and could cause heat management issues.
Tip: Double-check model numbers against official compatibility lists. - 2
Power down the system
Turn off power at the boiler and at the main circuit breaker. Use the voltage tester to ensure no live circuits are present before touching any wiring. This protects you and the equipment from shocks and shorts.
Tip: Lockout/tagout the breaker if others might restore power during work. - 3
Access the boiler terminal block
Remove the boiler access panel to reach the thermostat terminal strip. Identify the R, W, and C terminals. If your boiler uses a different labeling, refer to the diagram in the manual and avoid forcing wires into the wrong terminals.
Tip: Take a photo of the terminal layout before disconnecting anything. - 4
Connect the wires
Attach the thermostat wires to the corresponding terminals: R to R, W to W, and C to C if available. If wiring a dry-contact or using a C-wire adapter, follow the adapter’s instructions. Ensure solid, snug connections and secure routing.
Tip: Avoid bridging terminals that are not designed for the connection. - 5
Mount the thermostat base
Secure the thermostat base to the wall and gently tuck wires into the wall plate. Make sure the display is oriented for easy viewing and that the wall plate is flush against the surface.
Tip: Leave a little slack in the wires to allow for future removal or reconfiguration. - 6
Restore power and test
Turn power back on at the boiler and breaker. Start with a quick heat call to verify the boiler responds. Check that the thermostat displays the current room temperature and that heat turns on when expected.
Tip: Be prepared to power cycle if the heat does not respond right away. - 7
Configure thermostat settings
Program basic schedules, temperature setpoints, and any boiler-specific options. If it is a smart thermostat, connect to Wi-Fi and complete any prompts for boiler integration.
Tip: Set reasonable setback temperatures to optimize energy savings. - 8
Run a full test and document
Run multiple heat calls in different modes (heat, standby) and confirm stable operation. Document wiring changes and save manuals for future service. If anything feels off, power down and consult a pro.
Tip: Keep a testing log for future reference.
Questions & Answers
Will wiring a thermostat to a boiler void warranties?
Wiring changes can affect warranties if they alter the original heating system’s safety features. Always check the boiler and thermostat warranty terms before proceeding. When in doubt, consult the manufacturer or a licensed technician.
Warranties vary by manufacturer, so check terms or contact support before you start.
Do I need a C-wire to connect a thermostat to a boiler?
Many modern thermostats require a C-wire for reliable power in the thermostat. If your boiler block has a C terminal, connect the C wire; if not, consider a C-wire adapter or a battery powered thermostat option.
A C-wire is common for reliable power, but some wireless setups don’t require it.
Can I install this myself or should I hire a pro?
If you are comfortable with basic electrical work and have the boiler manuals, you can attempt wiring. For complex systems, multiple zones, or high-risk boilers, a licensed technician is recommended to ensure safety and compliance.
If in doubt, hire a pro for safety and correct wiring.
Will a combi boiler work with a thermostat in this setup?
Yes, most thermostats work with combi boilers provided the system offers 24-volt control and compatible terminals. Always verify with the boiler’s manual and thermostat documentation.
Combi boilers can work with the right 24-volt thermostat setup.
What safety steps should I follow before starting?
Always power down the boiler at the breaker and use a voltage tester. Work on a dry surface with insulated tools and keep water away from the work area.
Power off at the breaker and test wires before touching them.
What should I do if the boiler still doesn’t heat after wiring?
Recheck wiring against the boiler diagram, verify power, and test each control path. If issues persist, revert to the original wiring and seek professional help to avoid damage or safety risks.
If heat doesn’t respond after wiring, recheck connections or contact a pro.
Watch Video
What to Remember
- Verify compatibility before wiring
- Use the correct C-wire or bridge for power
- Power down and test thoroughly after wiring
- Document changes for future maintenance
- If unsure, consult a qualified technician