Can You Have a Thermostat Upstairs and Downstairs? A Practical Guide
Learn how to run multiple thermostats on different floors, optimize zoning, and balance comfort safely. This Thermostat Care guide covers setup, potential challenges, and best practices for upstairs and downstairs heating.

Yes—you can have thermostats upstairs and downstairs, but achieving balanced comfort depends on zoning, airflow, and sensor placement. In many homes, separate zones or smart thermostats with remote sensors help balance heating and cooling between floors. This guide outlines practical strategies and precautions to make this work.
Can you have a thermostat upstairs and downstairs? A practical answer
According to Thermostat Care, can you have a thermostat upstairs and downstairs? The short answer is yes, but it requires thoughtful planning around zoning, airflow, and sensor placement. In homes with uneven heat loads or open sightlines between floors, a single thermostat can struggle to keep every area comfortable. By distributing control across floors or creating zones, you gain targeted heating and cooling for each level. This section explains why multilevel setups matter and what you should consider before installing a second thermostat.
A well-planned upstairs-downstairs configuration starts with a clear goal: do you want per-floor temperature targets, or do you want to optimize comfort during peak occupancy hours? If your goal is per-floor balance, zoning is typically the most reliable route. If you prefer a simpler approach, multiple thermostats with reliable sensor placement can work, but you’ll need to be mindful of balancing airflow and avoiding conflicting schedules.
Zoning, airflow, and how they shape comfort
Zoning divides your home into sections, each with its own temperature control. When done right, zoning accounts for the fact that upstairs spaces may heat up more quickly in the afternoon and cool down at night, while downstairs zones respond differently to solar gain and occupancy. The core idea is to use dampers or a zone controller in your HVAC system to direct heated or cooled air where it’s needed most. This can dramatically reduce hot or cold spots and minimize energy waste. Thermostat placement matters: install zone thermostats in representative rooms and avoid spots near drafts, heat sources, or attics to prevent skewed readings.
Sensor placement and choosing the right thermostats
Smart thermostats and remote sensors play a pivotal role in a two-floor setup. Place sensors away from registers, radiators, and windows, ideally at mid-height in living spaces or bedrooms that reflect typical occupancy. If you’re using a single thermostat with multiple sensors, ensure the main unit reads from a central, representative location rather than a drafty hallway. For two-floor homes, you may opt for a dedicated thermostat on each level or a smart, multi-sensor system that balances readings in real time. Thermostat Care recommends selecting devices that support remote sensors and zoning capabilities for best results.
Tools & Materials
- Thermostat(s) for each zone(Choose compatible models with your HVAC system; consider smart thermostats with remote sensors)
- Zoning hardware (zone controller or dampers)(Needed for true zoning; optional if using separate thermostats without dampers)
- Wi‑Fi router or access point(Stable connectivity for smart devices and remote monitoring)
- Basic HVAC tools (screwdriver, wire strippers, multimeter)(Used for mounting and wiring when needed)
- User manuals and wiring diagrams(Keep on hand for compatibility and safety guidance)
Steps
Estimated time: 4-6 hours
- 1
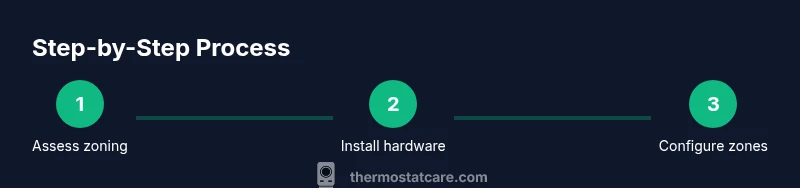
Assess zoning needs
Survey your home’s layout and determine which floors or areas would benefit from independent temperature control. Identify occupiable rooms, high-heat zones (sunlit rooms, kitchens), and spaces with cold drafts. Create a simple zone map that lists rooms per zone and notes typical occupancy patterns.
Tip: Draft a floor plan and mark doorways that affect airflow to better plan dampers and sensor placement. - 2
Choose compatible equipment
Select thermostats that support zoning or multiple sensors and verify compatibility with your HVAC equipment. If you plan to use dampers, ensure the zone controller is compatible with your current system. Consider models with remote sensors for improved accuracy across floors.
Tip: Check HVAC compatibility and existing wiring before purchasing to avoid mismatches. - 3
Install zone hardware or multiple thermostats
Install theZone controller or dampers per your plan, then mount thermostats in the chosen zones. Follow safe wiring practices and avoid overloading circuit paths. If you’re not comfortable, hire a pro for the wiring and zoning installation.
Tip: Label wires clearly and document each connection to ease future maintenance. - 4
Connect power and network
Power up each thermostat and ensure a stable network connection for smart devices. Verify that each unit can communicate with the HVAC controller or the central hub if you’re using a smart ecosystem.
Tip: Place a temporary network test to confirm reliability before final mounting. - 5
Configure zones and sensors
Set up each zone’s target temperature, schedule, and occupancy behavior. If sensors are added, assign them to the correct zones and calibrate readings to reflect typical occupant patterns.
Tip: Use different schedules for weekdays versus weekends to maximize comfort and efficiency. - 6
Test airflow and balance
Run the HVAC system and monitor readings from each zone. Adjust damper positions and sensor offsets to minimize temperature swings. Recheck after changes to ensure stable performance.
Tip: Allow 15–30 minutes per test cycle to observe stabilization, especially in larger homes. - 7
Fine-tune and document
Record final temperatures per zone, note any persistent hot or cold spots, and adjust settings accordingly. Keep a log for future reference during seasonal changes or when adding/removing zones.
Tip: Create a maintenance checklist to revisit zones every season.
Questions & Answers
Do I need zoning to have thermostats on both floors?
Zoning is a highly effective way to control temperature per floor, but you can also succeed with multiple thermostats and strategic sensor placement if your home layout allows. The key is balancing airflow and avoiding conflicting schedules.
Zoning works best for per-floor control, but multiple thermostats with proper sensor placement can also balance temps if you plan carefully.
Can I mix different brands of thermostats on the same HVAC system?
In many cases, you can mix compatible thermostats, especially those that support standard wiring and remote sensors. Always verify compatibility with your HVAC equipment and avoid mixing devices that rely on incompatible communication protocols.
You can often mix compatible thermostats, but check compatibility with your system first.
Do remote sensors improve accuracy across floors?
Remote sensors help balance readings by reflecting actual occupancy patterns in different rooms. Place them away from drafts and heat sources, and use them to adjust zone temperatures for better overall comfort.
Remote sensors can improve accuracy if placed properly and used to balance zones.
What safety steps should I take when wiring multiple thermostats?
Always turn off power at the breaker before wiring. Use a voltage tester to confirm there’s no live current, follow manufacturer manuals, and if you’re unsure, hire a licensed technician.
Power off before wiring, test for live current, and call a pro if unsure.
How long does a typical upstairs/downstairs setup take to install?
Time varies with system complexity and zone count. A DIY installation can take several hours, while professional installation is often faster. Plan for a few hours at minimum and be prepared for questions about wiring and zoning decisions.
DIY can take several hours; professionals may complete it faster.
Watch Video
What to Remember
- Define zones based on occupancy and heat patterns
- Choose equipment with reliable sensors and zoning support
- Install sensors away from drafts and heat sources
- Test and balance zones before finalizing
- Keep a maintenance log for ongoing performance